SIM Card setup
<— Return to: https://learn.above.im/s/12aef602-75ec-4367-b619-07ad051e2a6f/doc/mobile-cell-service-fCywCRG8av
—> Next lesson: https://learn.above.im/s/12aef602-75ec-4367-b619-07ad051e2a6f/doc/esim-setup-SU93vspGee
To transfer your SIM card and the phone line it carries simply remove the SIM card from your existing phone and insert the SIM into your new phone. Included in your box is a metal tool to help remove the SIM Card. Something like a paper-clip will also work.
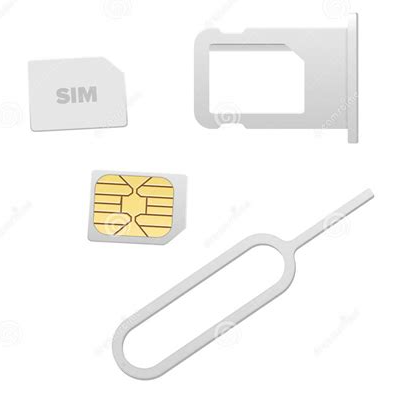
The location of the SIM card tray varies, but is generally on the left side or under side. Look for a very small hole on the side of the phone. Press the tip of the tool into the hole to eject the SIM Tray. Once the SIM card tray from your old phone pops out, just go ahead and remove the actual SIM card from it.
Be sure to remove the phone case first, if one is attached.
Now you can proceed to put the actual SIM card into the card tray of your new phone. The SIM card should only fit one direction - look for the missing corner on the SIM card & in the SIM tray for help. It should fit perfectly snug and slide into the phone smoothly - don't force it!
Note: Google Pixel phones do not have a removable back. Directly access the SIM tray from the side in order to transfer the SIM card.
Note: Most phone nowadays use the Nano SIM format. If your SIM card is too large, you may be able to break away a layer.
This video explains how to transfer the SIM card from your old phone into your Above Phone. Before making the switch, we encourage you to read our extensive article on Cell Service Privacy to help you make an informed decision.
By transferring your existing SIM card, you can keep your current number and service while gaining internet connectivity on your new device. It's as simple as swapping the card, and it works with virtually any carrier in any country.
Please note: features like voicemail and Wi-Fi calling may vary depending on your carrier.

SIM card sizes
SIM Card Types
SIM card sizes
Our phones use Nano SIMs, which are the standard size for all modern smartphones.
You can use any active SIM card with your Above Phone, as long as it's the nano size.
If your SIM is larger (micro or standard), simply pop out the smaller nano-sized SIM from the plastic frame provided by your carrier.
eSIMs are also fully supported and can be added in ⚙ Settings > Network & Internet > SIMs
Active internet connection is required to download the SIM into the phone.
Note that while the phone only has one physical SIM card slot, multiple eSIMs can be added also.
Up to 2 separate SIM cards be be active at the same time.

Ejecting the SIM card tray
Removing the SIM Card from Your Old Phone
Ejecting the SIM card tray
Power Off Your Devices
To avoid any issues, it's best to completely power off both phones before handling the SIM card.Locate the SIM Tray
Look for a small cutout on the side of your old phone — it will have a tiny pinhole.Use the SIM Eject Tool
Use the SIM tool that came with your Above Phone, or a straightened paperclip.
Insert it gently but firmly into the pinhole. You’ll feel a light “click” as the tray pops out.Remove the Tray and SIM Card
Carefully pull out the SIM tray. You’ll see the SIM card with its gold contacts facing up.
Push the SIM card out of the tray from the hole on the side, if present.Reinsert the Empty Tray (Optional)
Take note of how the tray was oriented, and gently slide it back into the old phone if you're not using it anymore.

Inserting SIM card into tray
Insert Your SIM into the Above Phone
Inserting SIM card into tray
Power Off the Device
Press and hold the power button to turn off your Above Phone completely.Locate the SIM Tray
Find the SIM tray on the left side near the bottom of the phone. Look for a small pinhole next to a slim outline.Eject the SIM Tray
Use the SIM eject tool (or a bent paperclip) to press gently but firmly into the pinhole.
The SIM tray will pop out like a button release.- Insert the SIM Card
Inserting SIM into Above Phone
Place your SIM card into the tray, gold contacts facing down. The notched corner will help guide correct placement. Re-insert the Tray
Take note of the tray’s orientation and slide it back into the phone gently.
The SIM tray should sit completely flush with the phone body, and the tray should slide back in easily into the phone — don’t force it.
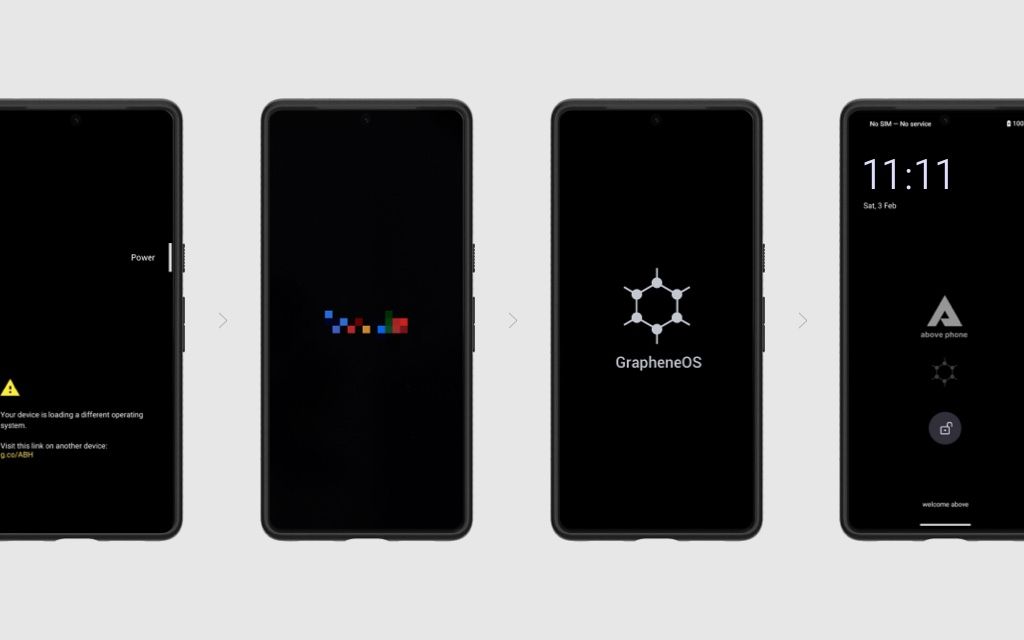
GrapheneOS bootup process
Power On Your Above Phone
GrapheneOS bootup process
Press and hold the Power button (located on the right side) for a few seconds until the screen lights up. During startup, you will see the following messages and logos:
A message indicating the phone is loading an alternate operating system
The Google logo
The GrapheneOS logo
These are all part of the secure boot process and confirm that your phone is running the privacy-respecting GrapheneOS system.
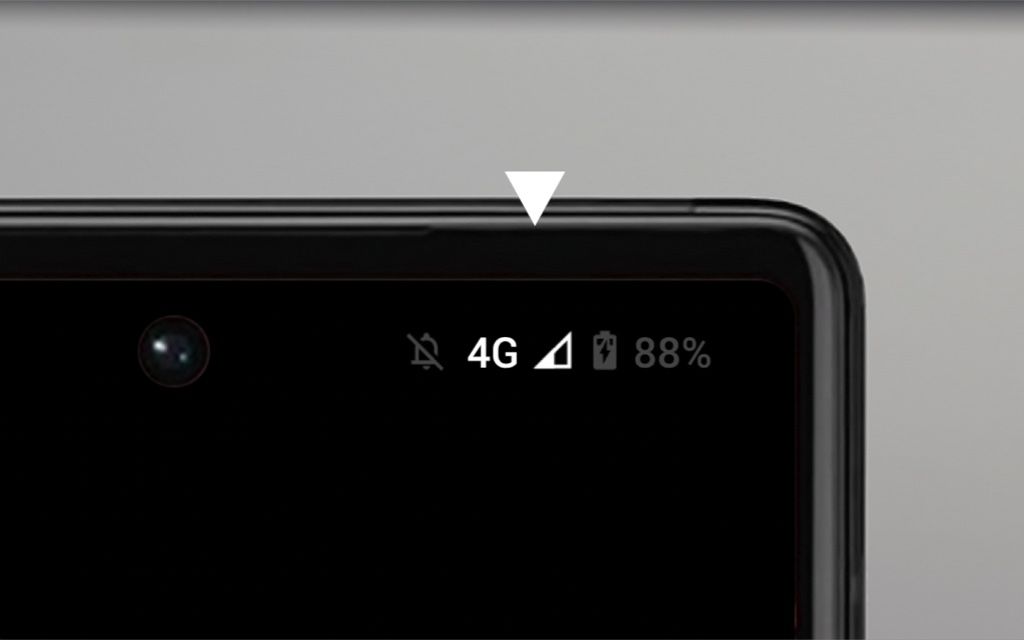
Mobile network indication
Enabling the SIM Card
Mobile network indication
Open Settings
Tap Network & Internet
Select SIMs
Enable Mobile Data
Toggle the Mobile data switch to the right.Enable Roaming (if needed)
Toggle Roaming on if you're outside your SIM provider's home region.
Important: Roaming can lead to extra charges, especially if you're in a different country from your SIM provider. Check your plan details to avoid unexpected fees.

Setting preferred network type
Set Your Preferred Network Type
Setting preferred network type
If you'd like to avoid connecting to 5G networks, you can manually set your phone to use 4G (LTE) instead.
Open Settings
Tap Network & Internet
Select SIMs
Tap Preferred Network Type
Choose your desired network

Testing network connections
Test Your Connection
Testing network connections
Now that your network settings are configured, confirm everything is working by trying the following:
Make a phone call – to verify voice service
Send a text message – to test SMS functionality
Browse the internet – open a website or app that uses mobile data
If all three work, your SIM is active and your connection is successfully established.
Troubleshooting Tips
If you're experiencing connection issues, first make sure that Mobile Data and Roaming are enabled in your settings. If the problem continues, try the following troubleshooting steps:
1. Reset Network Settings
Go to Settings > System > Reset Options
Tap Reset Wi-Fi, Mobile & Bluetooth
Confirm by tapping Reset Settings
This will reset all network-related configurations without affecting your personal data.
2. Restart the Phone
Press and hold the Power button (right side of the phone)
Tap Restart in the bottom-right corner
If the issue persists after restarting, repeat the steps above — sometimes a second attempt at resetting and rebooting can help the SIM activate properly.
3. Carrier Settings Overrides for phone calls, text messages, and WiFi Calling
If you are experiencing issues with not being able to send/receive text messages, make/receive phone calls, or use Wi-Fi Calling, enable Carrier Settings Overrides for VoLTE/Vo4G and Wi-Fi Calling Availability using the following steps:
Go to Settings > Network & Internet > SIMs > select your SIM > Carrier settings overrides
Tap on VoLTE/Vo4G availability
Toggle ON Forced available
Tap on Wi-Fi Calling availability
Toggle ON Forced available
Toggle ON Enable overrides
If calls, text messages or Wi-Fi Calling do not function properly after performing these steps, please engage with our support via email at support@above.im